


Table of contents
Many people have asked me that how does my blog feels so similar to my portfolio and matches the theme even though it is built using Hashnode and I have done very little work for the blog.
The answer is with custom CSS!

What is Hashnode?
For the readers who don't know about hashnode here is a little brief on what is Hashnode.
Hashnode is a free developer blogging platform that allows you to publish articles on your domain and helps you stay connected with a global developer community.
If you want to know more about hashnode, check out their website.
Become a Hashnode Ambassador
We are going to add custom CSS to our blog, so you need to become an ambassador to be able to do that. You can become an ambassador here.
Now that we are ready, let's see how I customized my blog and how you can too! 🥳
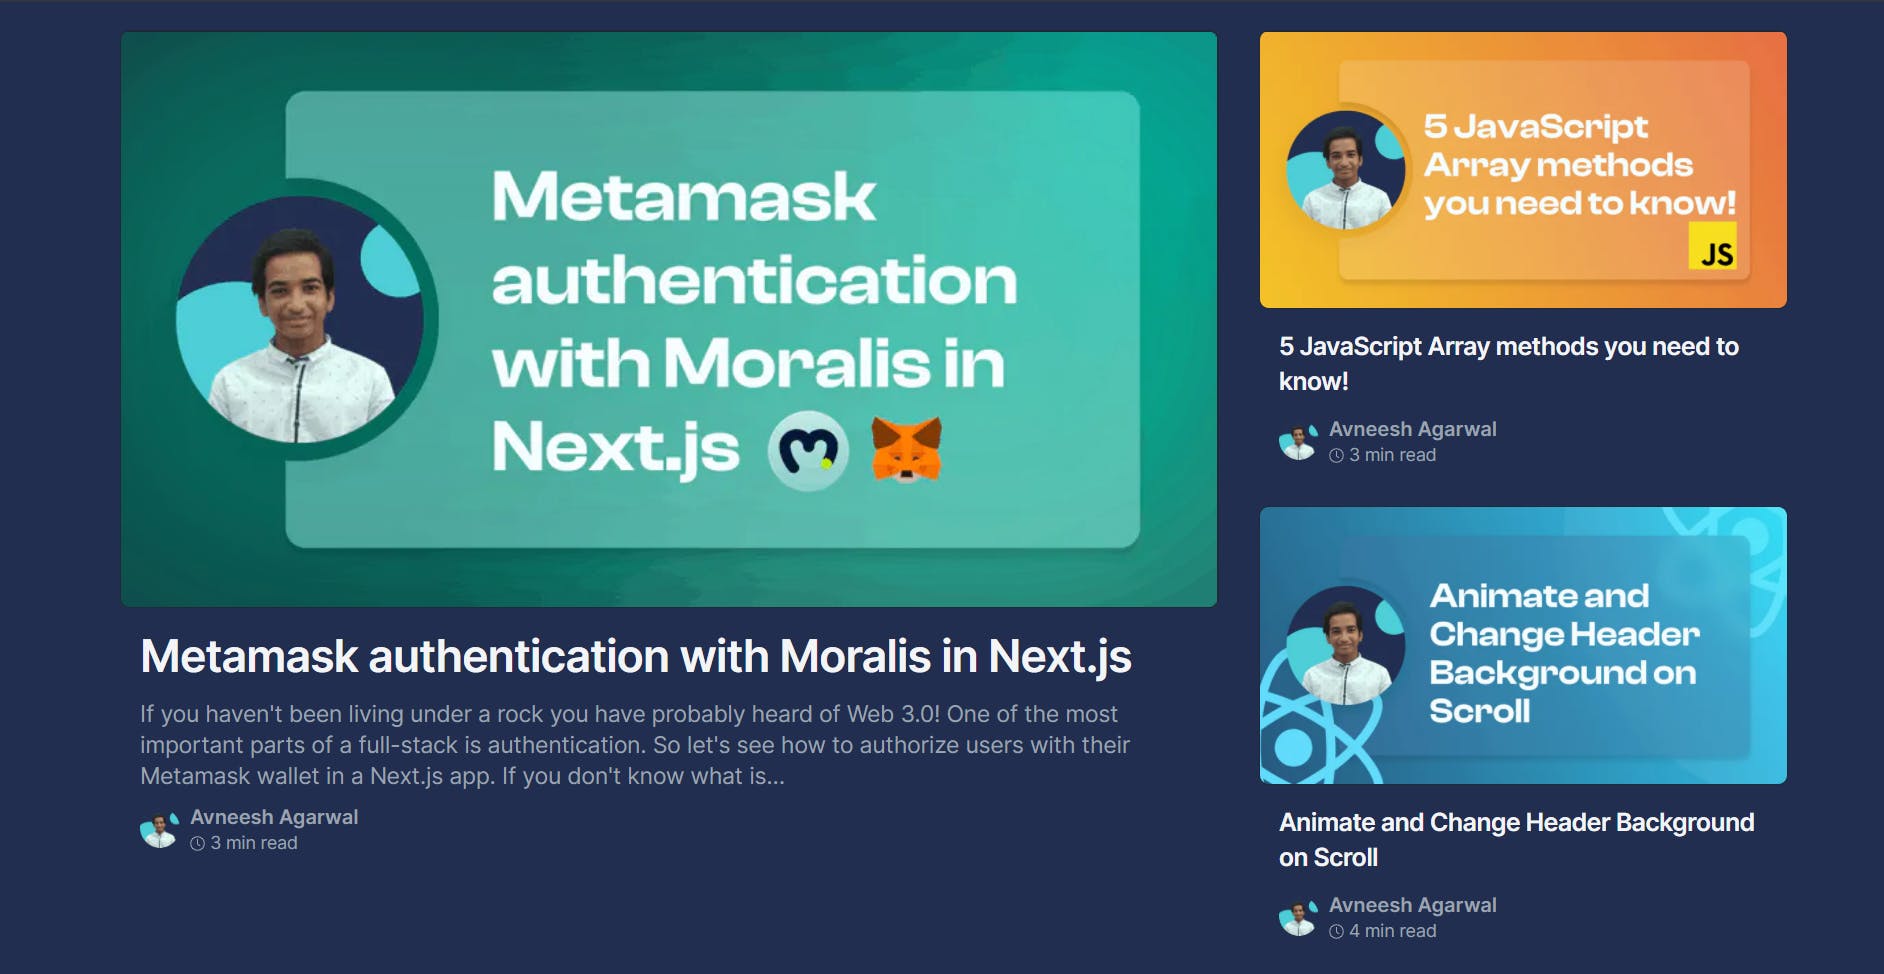
The blog home page
Styling the header
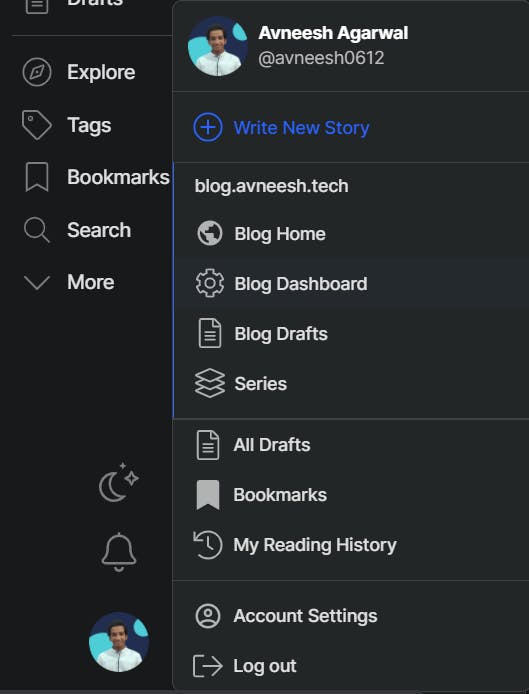
Go to your blog dashboard and click on Appearance
Changing the logo
In the appearance tab, you can select logos for dark mode and light mode.
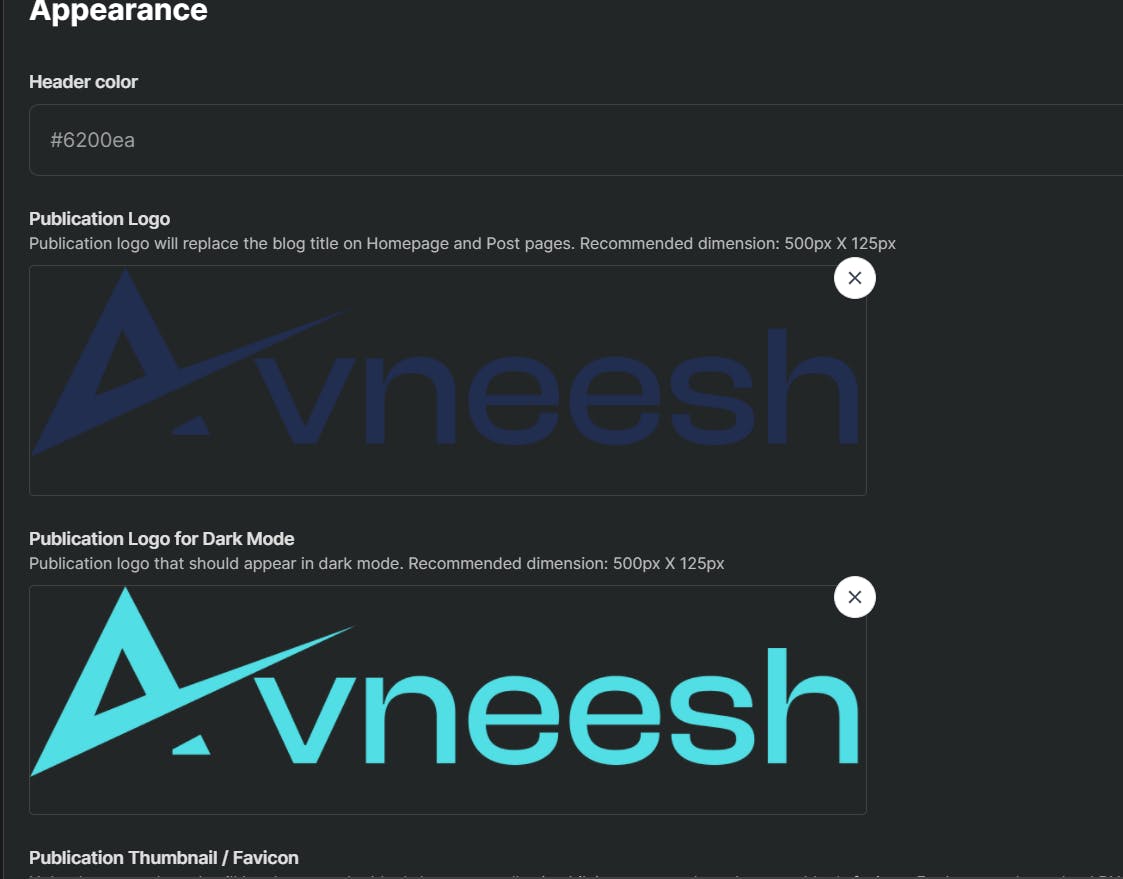
I built these with Figma you can use any tool you like 😄
Changing the color of the header
Now let's get to the CSS part.
There is an option to change the color of the header in the appearance tab itself but I will change it with CSS because I want different colors for light and dark mode. So scroll down and you will see an add custom CSS button. Toggle it on and click on update.
Now click on Add Custom CSS, you will be redirected to a page where you can write some code.

Add the following-
.blog-header {
  background: #52dee5 !important;
}

.dark .blog-header {
  background: #0a192f !important;
}
Click on Save styles, then Preview.

On seeing the preview, the header's color will be changed

Feel free to you use your brand color's here instead of mine :)
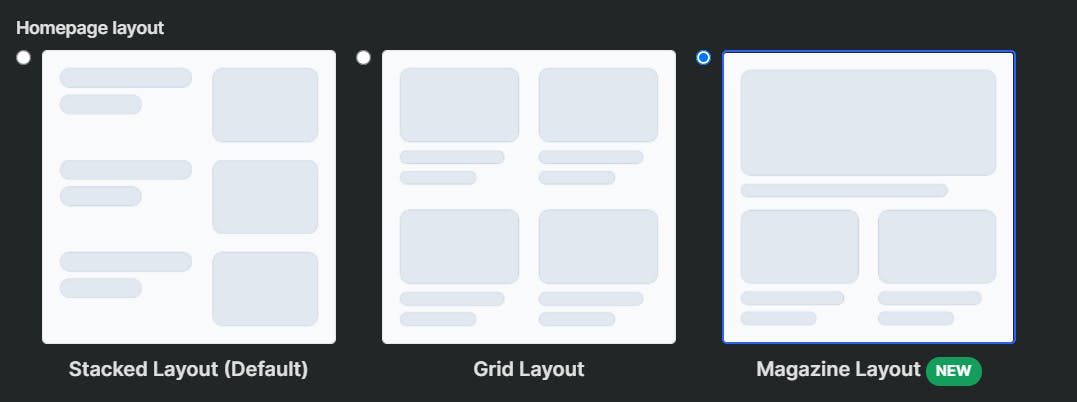
Customizing the layout
In the appearance tab, you have 3 layouts to choose from. I use the magazine layout. I would recommend you to use the magazine layout if you have quite a few articles
Changing the theme
Inside custom CSS I am going to add colors, to different classes
Background for the articles section-
.css-2j2uz3,
.blog-body,
.blog-featured-area {
  background: #93f8eb !important;
}

.dark .css-2j2uz3,
.dark .blog-body,
.dark .blog-featured-area {
  background: #222e50 !important;
}
In the preview, it will add colors for light and dark mode-
Aqua for light mode-

Blue Gray for dark mode-
P.S Some CSS classes may differ due to layouts, so if you see that some stylings are not applied then get the class of that section and add it in there.
The author and footer section
I am going to keep the same colors for the header, footer, and author container. So you can use the following-
.blog-author-container,
.blog-header {
  background: #52dee5;
}

.dark .blog-author-container,
.dark .blog-header {
  background: #0a192f;
}

.blog-footer-area {
  border-color: #0a192f !important;
  background: #52dee5 !important;
}

.dark .blog-footer-area {
  border-color: #52dee5 !important;
  background: #0a192f !important;
}
To remove code duplication you can remove the styles for the blog header that we added because I have added it together with the author container.
Load more button
I have also customized the load more button, so it looks like this-

To get the same button to add the following styles-
.css-1swncjx {
  color: #222e50 !important;
  border-color: #222e50 !important;
}

.css-1swncjx:hover {
  background-color: #222e50 !important;
  color: #52dee5 !important;
}

.dark .css-1swncjx {
  color: #52dee5 !important;
  border-color: #52dee5 !important;
}

.dark .css-1swncjx:hover {
  background-color: #52dee5 !important;
  color: #222e50 !important;
}
The scrollbar
Finally, on the homepage, I will change the scrollbar as the normal one looks boring-
::-webkit-scrollbar {
  width: 10px;
}

::-webkit-scrollbar-track {
  border-radius: 10px;
  background-color: #222e50;
}

::-webkit-scrollbar-thumb {
  border-radius: 10px;
  background: #52dee5;
}
Final code for home page
My complete CSS looks like this-
.css-2j2uz3,
.blog-body,
.blog-featured-area {
  background: #93f8eb !important;
}

.dark .css-2j2uz3,
.dark .blog-body,
.dark .blog-featured-area {
  background: #222e50 !important;
}

.blog-author-container,
.blog-header {
  background: #52dee5;
}

.dark .blog-author-container,
.dark .blog-header {
  background: #0a192f;
}

.blog-footer-area {
  border-color: #0a192f !important;
  background: #52dee5 !important;
}

.dark .blog-footer-area {
  border-color: #52dee5 !important;
  background: #0a192f !important;
}

.css-1swncjx {
  color: #222e50 !important;
  border-color: #222e50 !important;
}

.css-1swncjx:hover {
  background-color: #222e50 !important;
  color: #52dee5 !important;
}

.dark .css-1swncjx {
  color: #52dee5 !important;
  border-color: #52dee5 !important;
}

.dark .css-1swncjx:hover {
  background-color: #52dee5 !important;
  color: #222e50 !important;
}

::-webkit-scrollbar {
  width: 10px;
}

::-webkit-scrollbar-track {
  border-radius: 10px;
  background-color: #222e50;
}

::-webkit-scrollbar-thumb {
  border-radius: 10px;
  background: #52dee5;
}
The article page
Header
Since we are changing the header color via CSS and not in the appearance tab we need to add the same code in articles page also-
.blog-header {
  background: #52dee5 !important;
}

.dark .blog-header {
  background: #0a192f !important;
}
Background of the main content-
To change the background of the main content i.e the text, image, reactions button, etc. we need to target the blog-content-wrapper class
.blog-content-wrapper {
  background: #52dee5;
}

.dark .blog-content-wrapper {
  background: #0a192f;
}
Divider near author and article details

The contrast in this border is not very good, so I will change it to a brighter color-
.css-1pt9cni {
  border-color: #222e50 !important;
}

.dark .css-1pt9cni {
  border-color: #93f8eb !important;
}
Newsletter and audio
I use a gradient for the background of the two boxes and have some bright colors inside 🎉
.css-1s4b5hj,
.blog-subscription-article-wrapper {
  background: linear-gradient(
    90deg,
    hsla(235, 100%, 78%, 1) 0%,
    hsla(222, 77%, 33%, 1) 100%
  );
}

.blog-subscription-form-message {
  /* email subscription form message */
  color: white !important;
}

.css-14lmbqe,
.blog-subscription-form-button {
  color: #2b2e35 !important;
}

.dark .css-14lmbqe,
.dark .blog-subscription-form-button {
  color: #93f8eb !important;
}

audio::-webkit-media-controls-play-button,
audio::-webkit-media-controls-panel {
  background-color: #93f8eb;
  color: white !important;
}
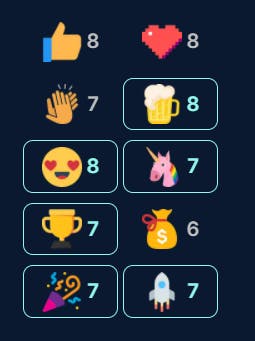
Reaction button
Let's style our reaction buttons to make them pop a little bit-
.css-4wwro6 {
  border-color: #222e50 !important;
  color: #2b2e35 !important;
}

.dark .css-4wwro6 {
  border-color: #93f8eb !important;
  color: #93f8eb !important;
}
Now the buttons look better. Make sure to smash them 😉
Sponsor button
If you have hashnode sponsors enabled then you can add the stylings for it-
.css-2enc5m {
  background-color: #222e50 !important;
  border-color: #222e50 !important;
  color: #52dee5 !important;
}

.dark .css-2enc5m {
  background-color: #52dee5 !important;
  border-color: #52dee5 !important;
  color: #0a192f !important;
}
This gives us a nice and simple button

Comments
Now our comments look very plain so let us add some colors to it with the following code-
.css-3159x8 {
  background: #93f8eb !important;
}

.dark .css-3159x8 {
  background: #222e50 !important;
}
Links
To create the links pop up and be more evident I am going to change their colors a bit-
.css-1azsmog a {
  color: #222e50 !important;
}

.dark .css-1azsmog a {
  color: #52dee5 !important;
}
Replace white borders in light mode
There were quite a few places in light mode where the white border wasn't looking good so I changed their border color-
.blog-similar-article-wrapper,
.css-6rnkih,
.css-h6a8j6,
.css-1s4b5hj,
.blog-subscription-article-wrapper {
  border-color: #222e50 !important;
}
Scrollbar
Like the home page add some styles for the scrollbar-
::-webkit-scrollbar {
  width: 10px;
}

::-webkit-scrollbar-track {
  border-radius: 10px;
  background-color: #0a192f;
}

::-webkit-scrollbar-thumb {
  border-radius: 10px;
  background: #52dee5;
}
Footer
Finally, I am gonna style the footer with some border and background-color-
.blog-footer-area {
  border-color: #222e50 !important;
  background: #93f8eb !important;
}

.dark .blog-footer-area {
  border-color: #93f8eb !important;
  background: #222e50 !important;
}
All the CSS for articles page-
.blog-header {
  /* header */
  background: #93f8eb !important;
}

.dark .blog-header {
  /* header dark */
  background: #222e50 !important;
}

.blog-content-wrapper {
  /* main content */
  background: #52dee5;
}

.dark .blog-content-wrapper {
  /* main content dark */
  background: #0a192f;
}

.css-1pt9cni {
   /*divider */
  border-color: #222e50 !important;
}

.dark .css-1pt9cni {
   /*divider dark */
  border-color: #93f8eb !important;
}

.css-1s4b5hj,
.blog-subscription-article-wrapper {
  /* email subscription and audio player background */
  background: linear-gradient(
    90deg,
    hsla(235, 100%, 78%, 1) 0%,
    hsla(222, 77%, 33%, 1) 100%
  );
}

.blog-subscription-form-message {
  /* email subscription form message */
  color: white !important;
}

.css-14lmbqe,
.blog-subscription-form-button {
  /* Newsletter form subscribe button */
  color: #2b2e35 !important;
}

.dark .css-14lmbqe,
.dark .blog-subscription-form-button {
  /* Newsletter form subscribe button dark */
  color: #93f8eb !important;
}

audio::-webkit-media-controls-play-button,
audio::-webkit-media-controls-panel {
  /* audio player */
  background-color: #93f8eb;
  color: white !important;
}

.css-4wwro6 {
  /* Reaction button */
  border-color: #222e50 !important;
  color: #2b2e35 !important;
}

.dark .css-4wwro6 {
  /* Reaction button dark */
  border-color: #93f8eb !important;
  color: #93f8eb !important;
}

.css-2enc5m {
  /* Sponsor button */
  background-color: #222e50 !important;
  border-color: #222e50 !important;
  color: #52dee5 !important;
}

.dark .css-2enc5m {
  /* Sponsor button dark */
  background-color: #52dee5 !important;
  border-color: #52dee5 !important;
  color: #0a192f !important;
}

.css-3159x8 {
  /* Comments */
  background: #93f8eb !important;
}

.dark .css-3159x8 {
  /* Comments dark */
  background: #222e50 !important;
}

.blog-footer-area {
  /* footer */
  border-color: #222e50 !important;
  background: #93f8eb !important;
}

.dark .blog-footer-area {
  /* footer dark */
  border-color: #93f8eb !important;
  background: #222e50 !important;
}

.css-1azsmog a {
  color: #222e50 !important;
}

.dark .css-1azsmog a {
  color: #52dee5 !important;
}

/* scrollbar */
::-webkit-scrollbar {
  width: 10px;
}

::-webkit-scrollbar-track {
  border-radius: 10px;
  background-color: #0a192f;
}

::-webkit-scrollbar-thumb {
  border-radius: 10px;
  background: #52dee5;
}

/* White borders */
.blog-similar-article-wrapper,
.css-6rnkih,
.css-h6a8j6,
.css-1s4b5hj,
.blog-subscription-article-wrapper {
  border-color: #222e50 !important;
}
I have also added a few comments for you all, so you can understand which class does what 🎉.
Conclusion
I would recommend you to change the colors a bit, try to tweak a few things, and make your blog unique to yourself so people can know that this is your website as soon as they see it. Also, make sure to hit the publish button when you are done. If you have customized your blog I would love to see them 👇.
See you next time ✌️