


How to create a custom sign-in page with NextAuth.js

Today, we are going to see how to build a custom login page with NextAuth.js.
In one of my previous articles, we saw what is NextAuth and how to build Google authentication with it. If you haven’t read it already, you can check it out here.
Let’s get started
In […nextauth].js, we will add a pages property below providers like this:
pages: {
signIn: "/signin",
},
Now, our […nextauth].js should look something like this
import NextAuth from "next-auth";
import Providers from "next-auth/providers";

export default NextAuth({
  providers: [
    Providers.Google({
      clientId: process.env.GOOGLE_CLIENT_ID,
      clientSecret: process.env.GOOGLE_CLIENT_SECRET,
    }),
  ],
  pages: {
    signIn: "/signin",
  },
});
Creating the sign-in page
In the pages directory, we are going to create a new page signin.js.
We are going to need a bunch of imports from the next-auth/client package. Here are all the imports:
import { providers, signIn, getSession, csrfToken } from "next-auth/client";
We will now create a simple React functional component:
import { providers, signIn, getSession, csrfToken } from "next-auth/client";

function signin() {
  return (
    <div>

    </div>
  );
}

export default signin;
Showing all the providers
Inside our component, we are going to map out all the providers in this case we have only Google sign-in.
We first need to get all the providers, we are going to use getServerSideProps to get all the providers:
export async function getServerSideProps(context) {
  return {
    props: {
      providers: await providers(context),
    },
  };
}
This is going to give us all the providers we have added in […nextauth].js and we are going to receive the providers as a prop.
import { providers, signIn, getSession, csrfToken } from "next-auth/client";

function signin({ providers }) {
  return (
    <div>
      {Object.values(providers).map((provider) => {
        return (
          <div key={provider.name}>
            <button onClick={() => signIn(provider.id)}>
              Sign in with {provider.name}
            </button>
          </div>
        );
      })}
    </div>
  );
}

export default signin;

export async function getServerSideProps(context) {
  return {
    props: {
      providers: await providers(context),
    },
  };
}
This is going to give us a simple button saying ‘Sign in with Google’. If we click on this button our sign-in flow should still work properly. Now if we sign in, we will be redirected to the sign-in page and not the home page.
We will now see how to fix this.
In the getServerSideProps function we are going to add this:
export async function getServerSideProps(context) {
  const { req } = context;
  const session = await getSession({ req });

  if (session) {
    return {
      redirect: { destination: "/" },
    };
  }

  return {
    props: {
      providers: await providers(context),
      csrfToken: await csrfToken(context),
    },
  };
}
Now if we sign in, we will be redirected to the home page, if you want to redirect the user to some other page change the location in the destination.
The final signin.js looks like this
import { providers, signIn, getSession, csrfToken } from "next-auth/client";

function signin({ providers }) {
  return (
    <div>
      {Object.values(providers).map((provider) => {
        return (
          <div key={provider.name}>
            <button onClick={() => signIn(provider.id)}>
              Sign in with {provider.name}
            </button>
          </div>
        );
      })}
    </div>
  );
}

export default signin;

export async function getServerSideProps(context) {
  const { req } = context;
  const session = await getSession({ req });

  if (session) {
    return {
      redirect: { destination: "/" },
    };
  }

  return {
    props: {
      providers: await providers(context),
      csrfToken: await csrfToken(context),
    },
  };
}
Styling the page
Now I am going to apply some simple stylings to the button and center it. I am going to use CSS modules for the styles as it is built-in, you can use anything you like.
- Create a file Signin.module.css
I will add a className to the container div and the button like this
 <div className={styles.container}>
      {Object.values(providers).map((provider) => {
        return (
          <div key={provider.name}>
            <button
              className={styles.button}
              onClick={() => signIn(provider.id)}
            >
              Sign in with {provider.name}
            </button>
          </div>
        );
      })}
    </div>
We will import styles from Signin.module.css like this
import styles from "../styles/Signin.module.css";
- Finally, we will add the styles in Signin.module.css to make it look good
.container {
  display: flex;
  align-items: center;
  justify-content: center;
  width: 100vw;
  height: 100vh;
}

.button {
  background-color: aqua;
  outline: none;
  border: none;
  border-radius: 5px;
  padding: 10px;
  cursor: pointer;
}
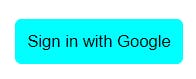
After applying these styles we get a centered, good-looking button.
I hope you could create your first custom sign-in page with Next auth.
Useful links: